


TL;DR
- Complete dirty work and inspect the prepared opening before installing the final lock.
- Keep lock components, fixings and protective packaging identified by door and model.
- Treat a dust sleeve or cover as a specific construction detail, not an automatic dustproof rating.
- Record condition before installation, after fitting and at handover so later problems can be investigated.
Quick Answer: what provides effective dust protection?
Use a controlled sequence: store the lock in clean packaging, keep it away from door machining and finishing work, inspect the empty pocket and holes, and fit the hardware using its installation instructions. Protect the installed assembly from later trades without obstructing operation. If debris may have entered the mechanism, obtain model-specific service advice instead of adding lubricant or opening the case. Specify any protective sleeve or cover by configuration and drawing; do not infer an ingress rating from its appearance.
Separate product protection from site cleanliness
Two questions belong in the enquiry. What protective construction does the selected lock contain? How will the door factory or installer prevent contamination around it? The first concerns the supplied configuration. The second concerns handling and sequence. Resolving only one leaves a gap in the installation plan.
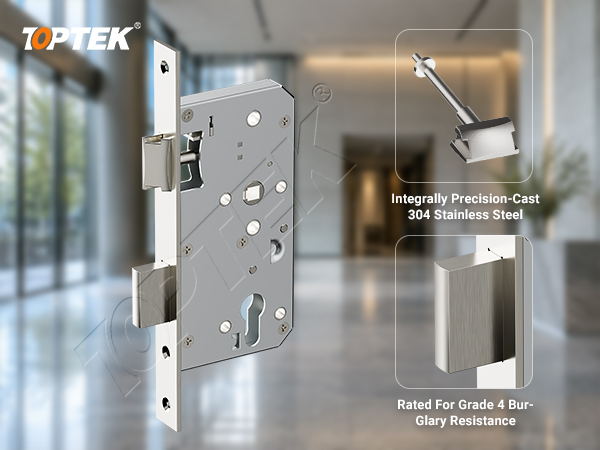
TOPTEK’s European lock product information describes protective sleeves intended to limit entry of wood chips around relevant openings. Ask whether that detail applies to the configuration being ordered. Request its location and the matching installation drawing. It does not justify calling the complete lock dustproof, assigning an IP rating or exposing an installed mechanism to machining debris.
Use the TOPTEK European mortise lock range to identify the family first. A sash lock and a passage latch do not present identical openings or functions. The cleanliness plan should name the model and the components fitted through it.
Map the work that can reintroduce contamination
List the operations around the opening, including work after the hardware team expects to finish. Drilling trim holes, adjusting a pocket, sanding a door edge and touching up a finish can happen at different stages. A handover record is more useful when it identifies these operations and the person responsible for releasing the opening.
As a manufacturer-specific example, ASSA ABLOY’s N1212 mounting instructions require removal of that lock during drilling or milling, cleaning the pocket and holes before installation, and keeping paint off the lock and strike. Use the selected TOPTEK model’s instructions for its actual installation and maintenance requirements.
| Activity | Question before hardware fitting | Evidence to retain |
|---|---|---|
| Pocket machining | Is the final preparation complete for this model? | Drawing revision and opening photograph |
| Trim and cylinder preparation | Are all required holes complete and inspected? | Trim reference and hole pattern check |
| Finishing | Is further sanding, coating or touch-up planned? | Trade release and remaining work list |
| Lock installation | Are the pocket, receiving recesses and hardware clean? | Installer’s condition record |
| Later site work | Who will protect the opening and request another check? | Named owner and reinspection trigger |
| Handover | Does the final assembly operate as specified? | Door number, test observations and sign-off date |
Keep this table specific to the job. For example, a finished factory door may need only transport and site protection checks. A door being machined on site needs a clear release point before final hardware enters the opening. Avoid marking every row complete simply because the lock has arrived.
Set up clean storage and a door-by-door parts record
Retain the product label with the lock until installation. Store the hardware away from loose screws, sanding dust and wet materials. Keep the matching cylinder, spindle, trim and fixings in an identified kit where the project uses kits. Mixing parts between openings can make a later stiffness complaint difficult to interpret.
At receipt, photograph visible damage or contamination before fitting. Record the package identifier and the affected quantity. A clear receiving record helps distinguish a transport issue from a condition introduced later. It should describe what is visible rather than assigning a cause that has not been established.
Temporary site hardware and final hardware also need different labels. If temporary equipment is used, agree its suitability with the door supplier and project team. Do not assume a final lock can act as a sacrificial construction lock and still be accepted without inspection. Keep emergency access and the intended door function available throughout the work.
Use three condition checks instead of one final signature
Check one: the prepared opening. Record the pocket and holes before the final lock hides them. Confirm completion of the approved preparation and identify remaining work. A photograph can document cleanliness, but it does not establish dimensions; keep the drawing check alongside it.
Check two: the fitted hardware. Follow the installation instructions and record operation after the lock, trim and cylinder are fitted. Note the exact configuration and any adjustment made. Do not treat a smooth loose lock as proof that the installed assembly will operate correctly.
Check three: the completed door. Repeat the functional check after the surrounding trades finish. Compare the result with check two. New stiffness, visible residue or changed contact should trigger investigation before acceptance. Record the observation, action and follow-up result for the same door number.
These stages create a useful timeline. If a problem appears after decorating, the record shows what changed without automatically blaming the decorator. If the problem was present at initial fitting, the team can examine preparation and component fit. Evidence should narrow the investigation rather than substitute for it.
Send a model reference and a short description of the construction sequence to TOPTEK if you need help defining the information required for an installation review.
Respond to suspected contamination without masking the symptom
Describe the symptom precisely: incomplete latch return, rough lever movement, difficult key operation or visible particles near an opening. Record whether it occurs with the door open, closed or both. Stop repeated forceful operation and retain the affected hardware identity for the supplier’s assessment.
A contamination suspicion is not a diagnosis. Tight trim, an unsuitable spindle, a stressed lockcase or strike contact can produce different forms of resistance. Use the mortise lock binding guide to organise the symptom record. Follow authorised service instructions before disassembly or treatment.
Do not apply a universal cleaning solvent or lubricant based on a different lock’s maintenance advice. Ask which materials and methods the selected product permits. If a component is removed for assessment, identify it and document the replacement fitted to the door. Keep the door’s required security and escape function under the project’s control.
A handover log the next team can actually use
A handover log should answer what was fitted, when it was checked and what happened next. It does not need a long narrative for every door. Use short, consistent entries and link photographs to the opening identifier. Record exceptions individually so a single defective opening is not hidden within a floor-wide approval.
| Field | Entry required |
|---|---|
| Door and location | Unique schedule number, floor and room |
| Hardware configuration | Lock, cylinder, trim and relevant accessory references |
| Preparation release | Date, responsible person and drawing revision |
| Initial condition | Packaging and visible hardware condition before fitting |
| Fitted operation | Observed latch, lever and locking operation as applicable |
| Later work | Trade, activity, protection method and date |
| Final condition | Observed result, exception reference and corrective action |
| Handover | Accepted configuration, date and responsible recipient |
For illustration, an entry saying “door 214, lever returns slowly after trim fitting” is more useful than “lock bad.” Add the trim reference and a short video showing the condition. This example is a recording method, not a TOPTEK customer case or a statement about a particular failure cause.
TOPTEK scope, common mistakes and RFQ requirements
TOPTEK’s catalogue identifies EN72SL as a sash mortise lock and EN72LL as a passage mortise lock. The EN72LL product reference helps distinguish passage operation from a latch-and-deadbolt arrangement. Match the inspection steps to the chosen function rather than testing a feature the lock does not have.
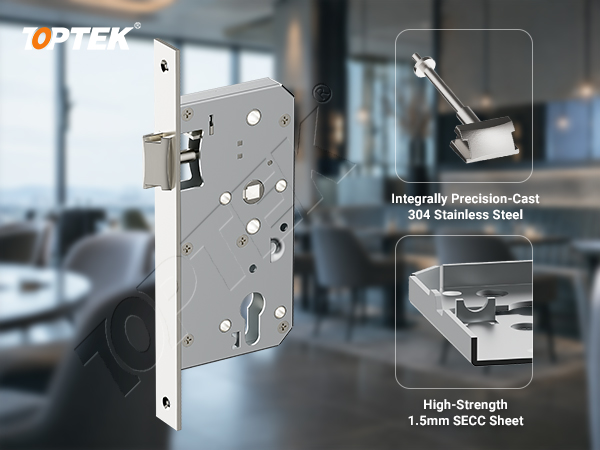
Common procurement mistakes include ordering an unspecified dust cover, treating a protective feature as a performance rating, and omitting responsibility for later work. Each leaves an acceptance question unresolved. Put the configuration, handling method and inspection responsibility in the purchase and installation documents.
Why TOPTEK? The enquiry can connect a named European lock model with the requested protective construction, packaging and inspection documents. Review the quality management overview and request the records relevant to your order. General manufacturing information is not evidence that every model has the same protective feature.
- Model, function, dimensions and associated trim or cylinder.
- Door material, machining location and installation sequence.
- Protective sleeve or cover requirement with a drawing reference.
- Packaging, labelling and door-kit requirements.
- Permitted maintenance method and installer instructions.
- Sample inspection, quantities, destination and required documents.
Frequently asked questions
Does Euro mortise lock dust protection mean the lock is dustproof?
No. A sleeve or cover is a specific construction feature. A dustproof or ingress-rating claim requires evidence for the exact product and test scope.
Should final hardware be present during door machining?
Plan machining before final lock installation and follow the selected product’s instructions. Keep the mechanism away from drilling and milling debris.
Can a passage lock use the same handover checklist as a sash lock?
They can share receiving and cleanliness fields, but functional checks must differ. Test only the latch and locking features supplied in the chosen configuration.
Does stiffness prove that dust entered the lock?
No. Stiffness can have several causes, including component fit and mounting conditions. Record when it occurs and obtain a model-specific assessment.
What should buyers request about a protective sleeve?
Request the applicable model, sleeve location, drawing reference and installation instructions. Confirm whether it is included in the quoted configuration.
Request a lock and installation package review
Effective protection combines a defined product configuration with clean handling and a traceable handover. For a commercial door hardware supply enquiry, send the model list, construction sequence and quantities to ivan.he@toptekaccess.com. Ask for the proposed configuration, packaging scope, applicable instructions and sample quotation.