
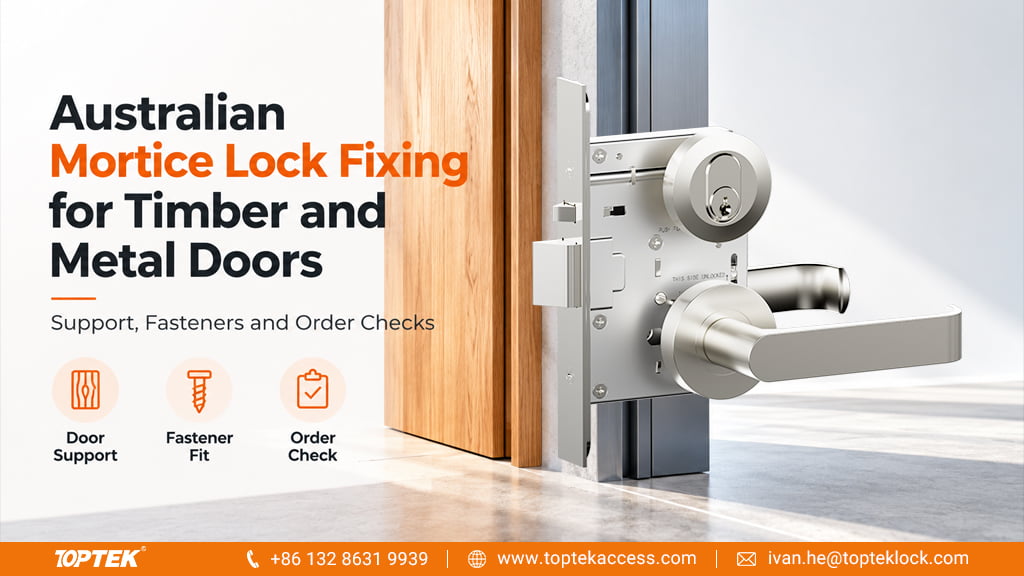

TL;DR: define what supports every fixing
- Specify the actual door construction, not only the description timber or metal.
- Distinguish lockcase mounting, decorative faceplate fixing, lever furniture fastening and frame-side strike fixing.
- For metal doors, identify the designed reinforcement or mounting arrangement; for timber doors, identify the available sound fixing material.
- Order the named fixing pack with the matching installation drawing, and check a representative door before repeating the preparation.
Quick answer: what determines Australian mortice lock fixing?
Australian mortice lock fixing depends on the exact lock assembly, the door construction and the designed support at each mounting point. A timber door and a metal door may require different fixing arrangements even when they use a similar lock function. Identify the lockcase, trim, faceplate and strike separately, then obtain the specified fasteners and supporting details for that combination. Do not select screw length, thread or reinforcement from the lock’s appearance alone. Coordinate the lock supplier’s instructions with the door manufacturer’s construction drawing before machining or ordering.
For purchasing teams, the key deliverable is a fixing schedule that says which part attaches to which support. This prevents an apparently complete hardware order arriving without the brackets, reinforcement details or fasteners needed by the actual door.
Map the fixing locations and their different jobs
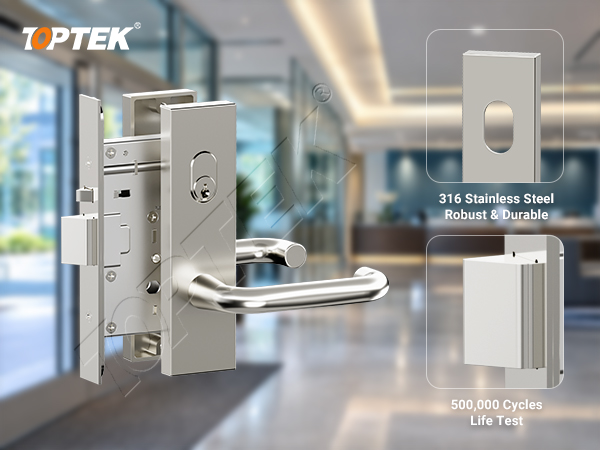
A mortice lock installation contains more than one mounting relationship. The lockcase is housed in the door edge, furniture is attached around the operating interfaces, and the strike is mounted on the receiving side. An outer faceplate may also have its own fixing arrangement. Confirm those relationships from the product drawing.
| Assembly location | Support to identify | Order information |
|---|---|---|
| Lockcase mounting | Designed door-edge fixing material or mounting component | Lock reference, fixing method and applicable fastener pack |
| Outer faceplate | Its intended attachment in the lock assembly | Correct plate and matching screws where separately supplied |
| Lever furniture | Door faces, fixing posts or approved through-fixing path | Trim reference, door thickness and connector arrangement |
| Cylinder furniture | Specified cylinder and trim mounting relationship | Cylinder format and compatible surrounding components |
| Strike or receiving plate | Frame or receiving-leaf construction | Strike reference, receiving-side support and fasteners |
Do not assume that the most visible screws secure the whole lockcase. A purchase description such as two screws supplied can be misleading unless it identifies their purpose. Request a labelled parts view when the supplier and installer use different terminology.
Timber doors: identify the actual fixing material
Timber door is a broad description. The lock area may include a solid section, a lock block, laminated material or other construction defined by the door manufacturer. Provide the relevant section and identify the intended mounting area rather than assuming that every part of the edge offers the same support.
For a new door, coordinate the mortice pocket and fixing positions before manufacture. For an existing door, record old holes, damaged material and previous repairs. A replacement lock with a similar faceplate can still place its fixings differently or rely on a different part of the door.
Ask the door supplier to specify how unsuitable or damaged fixing material should be addressed. Do not hide that condition beneath a wider plate or compensate with a longer screw chosen without reference to the construction. The repair and the hardware selection need to be compatible with the door’s intended use.
On a repeat order, keep the door construction reference linked to the fixing pack. A later change of core or edge construction should be reviewed before the old preparation and fastener choice are reused. The visible finish may remain the same while the mounting detail changes.
Metal doors: identify reinforcement, brackets and access
For a metal door, provide the actual profile or construction drawing. Identify where the lock mounts and whether the design uses reinforcement, tabs, brackets, threaded features or another documented arrangement. The lock supplier and door manufacturer should agree the interface rather than leaving it to site improvisation.
Consider how the specified fixing is installed and later serviced. A part may fit geometrically but require access that the finished door does not provide. Record the intended assembly sequence and any components that must be installed before the door section is closed.
Also identify the frame construction for the strike. A well-defined lockcase mounting detail does not settle how the receiving plate attaches to the frame. Keep the door-side and frame-side fasteners separate in the bill of materials and packing identification.
As a useful industry example, Lockwood’s Selector 3700 product information lists separate 3782 timber-door and aluminium-door mounting instructions. This illustrates the value of construction-specific documents; it does not authorise transferring Lockwood fixing details to a TOPTEK assembly.
Choose the fixing pack by specification, not appearance
Record the manufacturer’s fastener reference where available. If the order requires a detailed description, include the specified thread, length, head form, material or finish and quantity for each location. Obtain these values from the applicable drawing or instructions rather than deriving them from a photograph.
Keep lockcase screws, furniture connectors and strike screws in distinguishable groups. Parts with similar heads can have different lengths or threads. A mixed bag without identification shifts the selection decision to the installer and makes later fault tracing harder.
Where the door thickness or trim changes, review the relevant furniture connectors separately from the lockcase mounting. A new connector may be needed without changing the lockcase fasteners, or the proposed combination may need a broader review. The supplier should confirm the actual configuration.
Do not substitute a fastening method merely because it is readily available on site. Self-tapping, machine-threaded and other arrangements depend on the designed support. Any proposed substitution should identify what changes and obtain the responsible supplier’s approval for that construction.
Check a representative installation before repeat preparation
A representative sample should use the actual door construction, named lockcase, trim and fixing pack. A loose lock on a bench cannot reveal whether the finished door supplies the intended mounting support or whether the furniture connectors interfere with other parts.
- Compare the sample door construction and preparation with the current drawing.
- Confirm that each fixing location has the specified supporting feature.
- Identify and count the correct fasteners before assembly.
- Follow the supplier’s installation sequence and specified tightening requirements.
- Check that the furniture seats as intended and normal operation remains free.
- Inspect the receiving-side mounting and normal closing operation.
- Record any changes, then repeat the affected checks before approving the sample.
Do not invent a universal tightening torque or a pull-out acceptance value. If the project requires measured performance, obtain the applicable procedure, acceptance criteria and evidence from the responsible parties. A functional sample check and a formal performance test answer different questions.
Retain a photograph of the mounting detail before it becomes concealed, where the assembly process permits this. Link that image to the door number and drawing revision. It can be more useful during a later service enquiry than a photograph of the finished handle alone.
Common mistakes and their commercial consequences
Using metal door as the complete specification leaves the support detail unresolved. The resulting quotation may cover a lock and trim while excluding a required mounting component. Resolve those inclusions before comparing prices.
Reusing old fixing holes without checking their condition is another risk. A similar faceplate outline does not prove that the new assembly uses the same locations or that the old support remains suitable. Include existing preparation photographs and the proposed replacement drawing in the enquiry.
Mixing fasteners from different kits makes the final assembly difficult to trace. Keep spare packs labelled by model, location and revision rather than organising them only by visible finish. This also helps maintenance teams reorder the correct parts.
For a fire, smoke or other specially specified doorset, changes to preparation, reinforcement or fasteners require review against the applicable evidence and manufacturer’s instructions. Do not infer whole-door suitability from the lock family name. Confirm the exact configuration and document scope before specification.
TOPTEK product scope and evidence for the enquiry
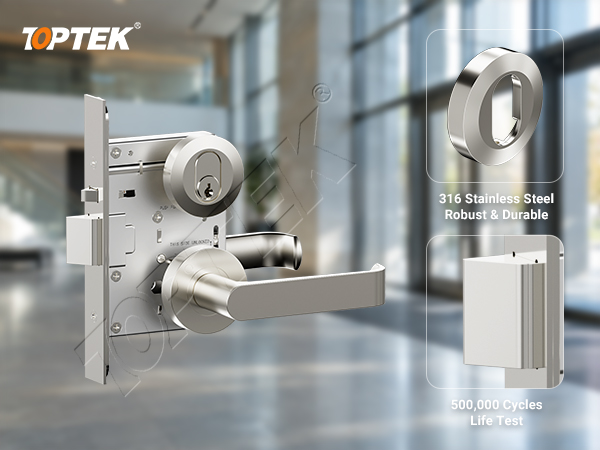
Use the TOPTEK Australian mortice lock range to identify the relevant family. The TKAU6400EC escutcheon configuration and TKAU6400RR round rose configuration provide distinct trim references. Confirm the mounting details for the selected assembly and actual door construction rather than assuming universal timber or metal compatibility.
Why TOPTEK? Configuration references, a defined parts list and inspection requirements give buyers a concrete basis for discussing supply. TOPTEK’s quality management information describes first-piece, in-process and sampling controls. Ask which records and checks will apply to your ordered configuration.
Link the fixing schedule to the Australian mortice lock door schedule, then use the commercial door hardware manufacturing enquiry to coordinate quantities, sample scope and packing. Keep door-manufacturer components clearly separated from hardware-supplier components.
RFQ checklist for timber and metal door fixing
- Door numbers, construction references and quantities by variant.
- Door-edge and frame sections showing the intended fixing support.
- Lockcase, trim, cylinder and strike references.
- Finished door thickness and relevant preparation drawings.
- Named fixing pack or detailed supplier-confirmed fastener schedule.
- Brackets, tabs or reinforcement components and their supply responsibility.
- Sample installation requirements and acceptance documents.
- Spare-pack identification, packing quantities and delivery destination.
Ask for an itemised response that identifies exclusions. If reinforcement is supplied by the door manufacturer, the hardware quotation should still reference the agreed interface. A low unit price has little practical meaning if the assembly arrives without a clearly assigned mounting solution.
Frequently asked questions
Can the same fixing pack be used on timber and metal doors?
Only where the manufacturer confirms that exact arrangement. The required fasteners and supporting construction may differ, so check the lock and door documents together.
Does a metal door always need the same reinforcement?
No universal detail applies. Identify the actual door construction and the mounting arrangement specified for the selected lock, including any required brackets or threaded features.
Are faceplate screws always the lockcase mounting screws?
Do not assume so. Use the labelled assembly drawing to distinguish the faceplate, lockcase mounting and furniture fixings for the exact product.
Can a longer screw solve an unsuitable fixing point?
Do not select a repair that way. Have the door supplier assess the available support and specify a compatible repair or mounting detail for the intended application.
What should be retained after a sample installation?
Keep the door construction reference, drawing revisions, component list, fixing pack identification, relevant photographs and completed inspection record with the hardware schedule.
Request a fixing review or an itemised quotation
A clear fixing specification connects every fastener to its intended support. Establish that relationship before repeating the preparation, and keep it traceable through samples, packing and service spares.
Send the door section and lock references for a fixing discussion.
Request a formal quotation listing the agreed hardware, fixing packs, quantities and sample requirements.