

Fire Door Mortise Lock Installation Inspection Checklist: 12 Hold Points Before Handover
A fire door mortise lock installation checklist should control the first prepared door, not merely confirm that the lockcase fits. Installers, contractors, and door production engineers need to verify the approved drawing, pocket geometry, strike relationship, compatible hardware, closing and latching behavior, and the final inspection record before they release batch machining or hand over the opening.
TL;DR
Approve one complete opening before machining a production batch. Match the exact lock model and door construction to the project evidence; use the controlled drawing for every dimension; keep the mortise pocket and permitted holes within the approved preparation; align the strike after the door is hung and stable; then test the lever, cylinder, latch, deadbolt, closer, escape operation, seals, and documentation as one system. A door that closes only when pushed, a latch that rubs the strike, or an unrecorded field modification is a hold point, not a pass.
Quick Answer: What Must Pass Before Handover?
A fire door mortise lock installation passes this checklist only when the installed opening matches the approved product and door documents, operates without binding, closes and positively latches under its own closing device, preserves the specified fire-protection details, and has a traceable inspection record. Dimensional fit alone is not approval.
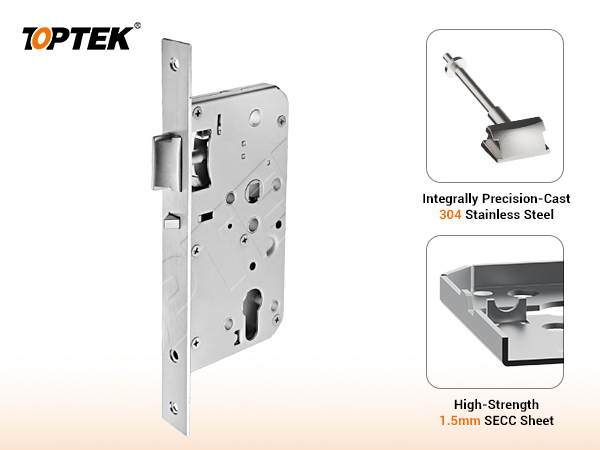
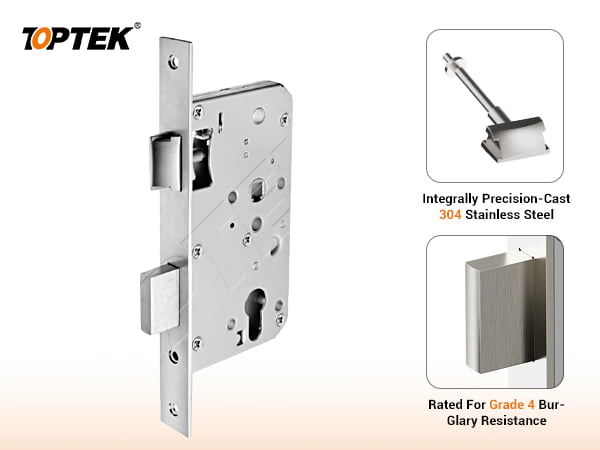
The TOPTEK EN 12209 Grade 3 mortise lock range includes different functions and centre-distance platforms. That range makes model control essential: the door preparation, cylinder, spindle, lever, strike, handing, and fire-door evidence must follow the exact selected configuration.
Key Takeaways for Installers and Door Production Engineers
- Use model-specific drawings. Backset, centre distance, case envelope, forend, strike, spindle, and cylinder positions are not universal.
- Make the first opening a production gate. Do not copy an unverified sample preparation across a door batch.
- Inspect the door and frame together. Hinge position, closer force, seals, gaps, and frame geometry influence latch-to-strike engagement.
- Separate mechanical and fire evidence. EN 12209 addresses mechanically operated locks and locking plates; doorset fire performance needs its own supporting evidence and installation scope.
- Record every deviation. Enlarged pockets, extra holes, changed strikes, substitute intumescent products, or altered hardware require technical review before acceptance.
Fire Door Mortise Lock Installation Release Matrix
The practical control sequence is document release, first-article inspection, functional testing, and final handover. Each stage should have a named owner and a clear pass, hold, or reject decision.
| Gate | What to verify | Pass evidence | Hold trigger |
|---|---|---|---|
| Document release | Door ID, lock model, function, drawing revision, door construction, fire and escape requirements | Approved submittal set with matching references | Mixed revisions, missing model scope, or unclear approval responsibility |
| First-article prep | Pocket, forend recess, spindle and cylinder holes, strike preparation, permitted fire protection | Measured first door compared with the controlled drawing | Oversized cavity, extra holes, damaged core, or unapproved field change |
| Hardware fit | Lockcase, strike, cylinder, spindle, lever, escutcheon, fixings, closer, seals | Complete installed sample without distortion or interference | Forced assembly, short engagement, rubbing, substitution, or missing component |
| Operational test | Lever return, latch and deadbolt movement, key or turn operation, self-closing, positive latching, escape behavior | Signed function record and corrective-action closure | Manual push needed, partial latch engagement, binding, or wrong function |
| Handover | Labels, seals, gaps, photos, serial or batch traceability, installer and inspector details | Opening-specific inspection pack | Unidentified door, undocumented modification, or unresolved nonconformity |
12 Hold Points Before Batch Release or Site Handover
1. Freeze the Door ID and Evidence Route
Start with the opening number, door and frame construction, leaf thickness, rating requirement, handing, swing direction, and target market. Then connect those fields to the approved door evidence, hardware schedule, lock documentation, and installer instructions. The TOPTEK CE mortise lock centre guide explains why a product classification and a complete fire-door assembly evidence route answer different questions.
2. Freeze the Exact Lock Model, Function, and Revision
Record the complete model reference and function before any cutting begins. A sash lock, passage latch, deadlock, night latch, classroom lock, roller lock, or escape lock can have different operations and preparation details even when the cases look similar. Confirm the drawing revision against the delivered sample; never approve from a catalogue image alone.
3. Verify Backset, Centre Distance, and Case Envelope
Measure from the correct datum on the actual door edge. Confirm the backset, lever-to-cylinder centre distance, case depth and height, forend width and length, spindle position, cylinder cut-out, fixing locations, and clearance for moving parts. Do not borrow dimensions from another 72, 78, or 85 series lock. The project drawing controls the preparation.
4. Inspect the Mortise Pocket Before Fitting the Lock
The pocket should be accurate, clean, and no larger than the approved preparation permits. Inspect timber or composite cores for breakout and steel doors for correct reinforcement and edge preparation. Remove chips and swarf without allowing debris into the case. A dust cover can reduce contamination risk, but it cannot restore removed door material or correct an oversized pocket.
5. Check Forend Seating Without Distorting the Case
The forend should sit as the door and lock instructions require, without rocking, bowing, or forcing the lockcase against the pocket. Tighten fixings evenly and use the specified fastener type. If tightening changes lever return, latch travel, or key operation, stop and investigate the preparation, fixing position, or trim interface.
6. Establish Strike Alignment on the Hung Door
Set the strike relationship only after the leaf, frame, hinges, seals, and closer are stable. Mark the actual latch and deadbolt path with the door operating normally. The latch should meet the correct strike surface and enter without excessive impact, scraping, or side load. Do not hide a sagging leaf or incorrect frame position by enlarging the strike opening without approval.
7. Confirm Cylinder, Spindle, Lever, and Escutcheon Compatibility
Check cylinder type and length, cam operation, spindle section and engagement, lever fixing, return spring behavior, escutcheon clearance, thumbturn or emergency release, and through-bolt positions. The TOPTEK EN72SL sash mortise lock page is one model reference, not a universal template. Compare all interfaces with the selected lock and approved hardware set.
8. Verify Handing, Latch Orientation, and Function Before Closing
Operate the lock with the door open before engaging the strike. Confirm latch orientation, inside and outside lever behavior, key or thumbturn sequence, deadbolt movement, auxiliary features, and any field-configurable escape setting. If the project uses an EN72EL escape mortise lock, verify the required inside release and outside access behavior against the door schedule and applicable escape route.
9. Confirm Intumescent and Seal Details Against Evidence
Install only the wrap, pad, liner, seal, mastic, or local protection required by the approved doorset evidence and instructions. Its material, thickness, position, and coverage matter. More material is not automatically safer; an unapproved layer can obstruct the mechanism or change the installed configuration. Record the product and location when the project requires traceability.
10. Run Closing and Positive-Latching Tests
Release the door from the positions specified by the project inspection plan and confirm that the closer overcomes hinge friction, seal resistance, latch pressure, and other normal forces. The door should close into the frame and latch without a person pushing it. UK government fire-door guidance likewise emphasizes checking that a self-closing door fully closes into its frame and overcomes latch or floor friction. See the Fire Safety (England) Regulations fire-door guidance.
11. Test Security, Access, and Escape Operations Separately
Run every scheduled operation: inside lever, outside lever, key, cylinder, thumbturn, emergency release, latchbolt, and deadbolt. Do not infer escape compliance from fire resistance or from an EN 12209 classification. BSI describes EN 12209 as addressing characteristics of mechanically operated locks and locking plates; confirm the current edition and the project’s regulatory basis through the official BSI EN 12209 page.
12. Photograph, Sign, Release, or Quarantine
Record the opening ID, product and drawing references, measured checkpoints, hardware set, test result, nonconformities, corrective actions, date, installer, and inspector. Photograph the pocket before closure where permitted, plus the forend, strike, seals, labels, and finished opening. Release batch production only after the first article passes. Quarantine any door with an unsupported field modification; Intertek’s Qualified Personnel hardware installer information illustrates why fire-door field preparation must follow the relevant listing and authorized route.
Common Mistakes That Should Stop the Release
- Scaling a drawing or using a screenshot: production dimensions should come from a controlled, legible drawing or template.
- Approving only the lock pocket: the strike, cylinder, spindle, trim, closer, seals, and hinges are part of the operating interface.
- Filing the strike until the latch enters: first identify whether the cause is hinge drop, frame position, seal pressure, closer setting, wrong handing, or an incorrect datum.
- Using screw torque to pull parts into alignment: forced assembly can distort the case and create friction.
- Testing with the door held or pushed: final acceptance requires the complete opening to close and latch under its intended operating condition.
- Copying one successful prep across every door type: timber, composite, and steel constructions may use different reinforcement, tolerances, fire-protection details, and evidence.
- Closing a nonconformity verbally: undocumented repairs and substitutions create later inspection and warranty risk.
Buyer Checklist: What Should a Factory or Contractor Audit?
- One opening ID tied to one approved door and hardware schedule.
- Exact lock model, function, drawing number, revision, and physical sample match.
- Recorded door material, thickness, handing, swing, frame, reinforcement, seals, and closer.
- Measured preparation checkpoints with defined acceptance criteria from the approved documents.
- Strike alignment checked after hanging and before final cosmetic work.
- Complete hardware compatibility and operation test, not a lockcase-only check.
- Fire-protection materials and field changes traced to written approval.
- Pass, hold, reject, corrective action, reinspection, and sign-off fields.
RFQ Checklist for Installation and Sample Approval Support
Send a compact but traceable package so the lock supplier can review the interfaces before quotation or sample approval:
- Target country, project type, fire and escape requirements, and approving party.
- Door schedule, opening IDs, door and frame material, leaf thickness, handing, swing, and quantity.
- Required lock function and preferred 72, 78, or 85 series platform if already selected.
- Door edge, face, frame, and strike drawings with revision numbers and dimensional datums.
- Backset, centre distance, forend, case envelope, cylinder, spindle, lever, escutcheon, and fixing requirements.
- Closer, hinge, seals, intumescent protection, access-control interfaces, and any permitted field preparation.
- Required certificates, reports, model schedules, installation instructions, samples, packaging, and inspection records.
Low-friction route: if a complete door schedule is not ready, send clear photos of the door edge and frame, the door and frame materials, existing lock model, basic dimensions, known voltage for electrified hardware, target market, and estimated quantity. TOPTEK can identify the missing checkpoints before a formal RFQ.
TOPTEK Evidence and Installation-Review Support
TOPTEK supports EN 12209 lock projects through model selection, drawing coordination, first-article sample review, functional testing, and controlled production. Its 72, 78, and 85 series cover multiple lock functions, so engineering review focuses on the exact model rather than treating the family name as an installation specification.
The public TOPTEK certification page provides the current route for EN 12209 and related project documents. Third-party certificates and fire-test evidence should be checked for model and configuration scope. TOPTEK’s internal laboratory and production inspections support development and batch consistency; they are not presented as a substitute for third-party certification or complete doorset approval.
FAQ: Fire Door Mortise Lock Installation Inspection
Can one mortise lock template be used for every 72 mm lock?
No. Centre distance alone does not define backset, case envelope, forend, strike, fixing, spindle, cylinder, or function details. Use the drawing for the exact model and revision.
Should the strike be positioned before the door is hung?
The frame may be prepared earlier, but final strike relationship must be checked on the hung, aligned, and operational door with its hinges, seals, and closer in place.
Is a door acceptable if the latch works when someone pushes it closed?
No. Where the opening requires self-closing and positive latching, it should close and latch under the specified test condition without manual assistance.
Can an installer enlarge the pocket or strike opening on site?
Do not assume so. Compare the proposed change with the door and hardware evidence, instructions, listing, and approval route. Obtain written technical authorization where required.
Does EN 12209 prove the complete fire-door installation?
No. EN 12209 addresses the mechanical lock and locking plate characteristics. The actual fire-door assembly, installation configuration, hardware set, and local acceptance route need separate supporting evidence.
What is the most useful supplier check before batch machining?
Submit the controlled door drawings, exact lock and hardware set, and one first-article opening for review. This exposes interface errors before they are repeated across the batch.
Conclusion: Approve the Opening, Not Just the Lockcase
The safest production decision is to treat the first complete door as a release gate. Verify the approved evidence and model, measure the preparation from controlled datums, align the strike on the stable opening, test every scheduled function, confirm self-closing and positive latching, and preserve a signed inspection record.
Project risk summary: an oversized pocket, mixed drawing revision, forced lockcase, incompatible trim, substituted fire-protection material, or misaligned strike can create rework, failed inspection, unreliable latching, and unsupported compliance assumptions. Stop the batch when the first article does not match the approved configuration.
Request a Fire Door Lock Installation Review
Email ivan.he@toptekaccess.com with the door schedule, door and frame drawings, exact lock function, door material and thickness, backset and centre distance, strike detail, lever and cylinder requirements, target market, quantity, and required evidence. TOPTEK can return a model recommendation, drawing and door-preparation review, hardware compatibility checklist, sample route, certification-document route, and quotation.
If drawings are incomplete, begin with door photos, material, existing lock model, basic dimensions, target market, quantity, and any known voltage. The engineering team can identify what still needs confirmation.